功能需求是公司要做一个大的运营平台:
1、运营平台有自身的数据库,维护用户、角色、菜单、部分以及权限等基本功能。
2、运营平台还需要提供其他不同服务(服务a,服务b)的后台运营,服务a、服务b的数据库是独立的。
所以,运营平台至少要连三个库:运营库,a库,b库,并且希望达到针对每个功能请求能够自动切换到对应的数据源(我最终实现是针对service的方法级别进行切换的,也可以实现针对每个dao层的方法进行切换。我们系统的功能是相互之间比较独立的)。
第一步:配置多数据源
1、定义数据源:
我采用的数据源是阿里的druiddatasource(用dbcp也行,这个随便)。配置如下:
|
1
2
3
4
5
6
7
8
9
10
11
12
13
14
15
16
17
18
19
20
21
22
23
24
25
26
27
28
29
30
31
32
33
34
35
36
37
38
39
40
41
42
43
44
45
46
47
48
49
50
51
52
53
54
55
56
57
58
59
60
61
62
63
64
65
66
67
68
69
70
71
72
73
74
|
<!-- op datasource --> <bean id="opdatasource" class="com.alibaba.druid.pool.druiddatasource" init-method="init" destroy-method="close"> <property name="url" value="${db.master.url}" /> <property name="username" value="${db.master.user}" /> <property name="password" value="${db.master.password}" /> <property name="driverclassname" value="${db.master.driver}" /> <property name="initialsize" value="5" /> <property name="maxactive" value="100" /> <property name="minidle" value="10" /> <property name="maxwait" value="60000" /> <property name="validationquery" value="select 'x'" /> <property name="testonborrow" value="false" /> <property name="testonreturn" value="false" /> <property name="testwhileidle" value="true" /> <property name="timebetweenevictionrunsmillis" value="600000" /> <property name="minevictableidletimemillis" value="300000" /> <property name="removeabandoned" value="true" /> <property name="removeabandonedtimeout" value="1800" /> <property name="logabandoned" value="true" /> <!-- 配置监控统计拦截的filters --> <property name="filters" value="config,mergestat,wall,log4j2" /> <property name="connectionproperties" value="config.decrypt=true" /> </bean> <!-- servera datasource --> <bean id="serveradatasource" class="com.alibaba.druid.pool.druiddatasource" init-method="init" destroy-method="close"> <property name="url" value="${db.servera.master.url}" /> <property name="username" value="${db.servera.master.user}" /> <property name="password" value="${db.servera.master.password}" /> <property name="driverclassname" value="${db.servera.master.driver}" /> <property name="initialsize" value="5" /> <property name="maxactive" value="100" /> <property name="minidle" value="10" /> <property name="maxwait" value="60000" /> <property name="validationquery" value="select 'x'" /> <property name="testonborrow" value="false" /> <property name="testonreturn" value="false" /> <property name="testwhileidle" value="true" /> <property name="timebetweenevictionrunsmillis" value="600000" /> <property name="minevictableidletimemillis" value="300000" /> <property name="removeabandoned" value="true" /> <property name="removeabandonedtimeout" value="1800" /> <property name="logabandoned" value="true" /> <!-- 配置监控统计拦截的filters --> <property name="filters" value="config,mergestat,wall,log4j2" /> <property name="connectionproperties" value="config.decrypt=true" /> </bean> <!-- serverb datasource --> <bean id="serverbdatasource" class="com.alibaba.druid.pool.druiddatasource" init-method="init" destroy-method="close"> <property name="url" value="${db.serverb.master.url}" /> <property name="username" value="${db.serverb.master.user}" /> <property name="password" value="${db.serverb.master.password}" /> <property name="driverclassname" value="${db.serverb.master.driver}" /> <property name="initialsize" value="5" /> <property name="maxactive" value="100" /> <property name="minidle" value="10" /> <property name="maxwait" value="60000" /> <property name="validationquery" value="select 'x'" /> <property name="testonborrow" value="false" /> <property name="testonreturn" value="false" /> <property name="testwhileidle" value="true" /> <property name="timebetweenevictionrunsmillis" value="600000" /> <property name="minevictableidletimemillis" value="300000" /> <property name="removeabandoned" value="true" /> <property name="removeabandonedtimeout" value="1800" /> <property name="logabandoned" value="true" /> <!-- 配置监控统计拦截的filters --> <property name="filters" value="config,mergestat,wall,log4j2" /> <property name="connectionproperties" value="config.decrypt=true" /> </bean> |
我配置了三个数据源:opdatasource(运营平台本身的数据源),serveradatasource,serverbdatasource。
2、配置multipledatasource
multipledatasource相当于以上三个数据源的一个代理,真正与spring/mybatis相结合的时multipledatasource,和单独配置的datasource使用没有分别:
|
1
2
3
4
5
6
7
8
9
10
11
12
13
14
15
16
17
18
19
20
21
22
23
24
25
26
27
28
29
30
31
32
33
34
35
36
37
38
39
40
41
42
43
44
|
<!-- spring整合mybatis:配置multipledatasource --> <bean id="sqlsessionfactory" class="com.baomidou.mybatisplus.spring.mybatissqlsessionfactorybean"> <property name="datasource" ref="multipledatasource" /> <!-- 自动扫描mapping.xml文件 --> <property name="mapperlocations"> <list> <value>classpath*:/sqlmapperxml/*.xml</value> <value>classpath*:/sqlmapperxml/*/*.xml</value> </list> </property> <property name="configlocation" value="classpath:xml/mybatis-config.xml"></property> <property name="typealiasespackage" value="com.xxx.platform.model" /> <property name="globalconfig" ref="globalconfig" /> <property name="plugins"> <array> <!-- 分页插件配置 --> <bean id="paginationinterceptor" class="com.baomidou.mybatisplus.plugins.paginationinterceptor"> <property name="dialecttype" value="mysql" /> <property name="optimizetype" value="alidruid" /> </bean> </array> </property> </bean> <!-- mybatis 动态实现 --> <bean id="mapperscannerconfigurer" class="org.mybatis.spring.mapper.mapperscannerconfigurer"> <!-- 对dao 接口动态实现,需要知道接口在哪 --> <property name="basepackage" value="com.xxx.platform.mapper" /> <property name="sqlsessionfactorybeanname" value="sqlsessionfactory"></property> </bean> <!-- mp 全局配置 --> <bean id="globalconfig" class="com.baomidou.mybatisplus.entity.globalconfiguration"> <property name="idtype" value="0" /> <property name="dbcolumnunderline" value="true" /> </bean> <!-- 事务管理配置multipledatasource --> <bean id="transactionmanager" class="org.springframework.jdbc.datasource.datasourcetransactionmanager"> <property name="datasource" ref="multipledatasource"></property> </bean> |
了解了multipledatasource所处的位置之后,接下来重点看下multipledatasource怎么实现,配置文件如下:
|
1
2
3
4
5
6
7
8
9
10
|
<bean id="multipledatasource" class="com.xxxx.platform.commons.db.multipledatasource"> <property name="defaulttargetdatasource" ref="opdatasource" /> <property name="targetdatasources"> <map> <entry key="opdatasource" value-ref="opdatasource" /> <entry key="serveradatasource" value-ref="serveradatasource" /> <entry key="serverbdatasource" value-ref="serverbdatasource" /> </map> </property> </bean> |
实现的java代码如下,不需要过多的解释,很一目了然:
|
1
2
3
4
5
6
7
8
9
10
11
12
13
14
15
16
17
18
19
20
21
22
23
24
25
26
|
import org.springframework.jdbc.datasource.lookup.abstractroutingdatasource;/** * * @classname: multipledatasource * @description: 配置多个数据源<br> * @author: yuzhu.peng * @date: 2018年1月12日 下午4:37:25 */public class multipledatasource extends abstractroutingdatasource { private static final threadlocal<string> datasourcekey = new inheritablethreadlocal<string>(); public static void setdatasourcekey(string datasource) { datasourcekey.set(datasource); } @override protected object determinecurrentlookupkey() { return datasourcekey.get(); } public static void removedatasourcekey() { datasourcekey.remove(); }} |
继承自spring的abstractroutingdatasource,实现抽象方法determinecurrentlookupkey,这个方法会在每次获得数据库连接connection的时候之前,决定本次连接的数据源datasource,可以看下spring的代码就很清晰了:
|
1
2
3
4
5
6
7
8
9
10
11
12
13
14
15
16
17
18
19
20
21
|
/*获取连接*/ public connection getconnection() throws sqlexception { return determinetargetdatasource().getconnection(); } protected datasource determinetargetdatasource() { assert.notnull(this.resolveddatasources, "datasource router not initialized"); /*此处的determinecurrentlookupkey为抽象接口,获取具体的数据源名称*/ object lookupkey = determinecurrentlookupkey(); datasource datasource = (datasource)this.resolveddatasources.get(lookupkey); if ((datasource == null) && (((this.lenientfallback) || (lookupkey == null)))) { datasource = this.resolveddefaultdatasource; } if (datasource == null) { throw new illegalstateexception("cannot determine target datasource for lookup key [" + lookupkey + "]"); } return datasource; } /*抽象接口:也即我们的multipledatasource实现的接口*/ protected abstract object determinecurrentlookupkey(); |
第二步:每次请求(service方法级别)动态切换数据源
实现思路是利用spring的aop思想,拦截每次的service方法调用,然后根据方法的整体路径名,动态切换multipledatasource中的数据的key。我们的项目,针对不同服务也即不同数据库的操作,是彼此之间互相独立的,不太建议在同一个service方法中调用不同的数据源,这样的话需要将动态判断是否需要切换的频次(aop拦截的频次)放在dao级别,也就是sql级别。另外,还不方便进行事务管理。
我们来看动态切换数据源的aop实现:
|
1
2
3
4
5
6
7
8
9
10
11
12
13
14
15
16
17
18
19
20
21
22
23
24
25
26
27
28
29
30
31
32
33
34
35
36
37
38
39
40
41
42
43
44
45
46
47
48
49
50
51
52
53
54
55
56
|
import java.lang.reflect.proxy;import org.apache.commons.lang.classutils;import org.aspectj.lang.joinpoint;import org.aspectj.lang.annotation.after;import org.aspectj.lang.annotation.aspect;import org.aspectj.lang.annotation.before;import org.springframework.core.annotation.order;/** * 数据源切换aop * * @author yuzhu.peng * @since 2018-01-15 */@aspect@order(1)public class multipledatasourceinterceptor { /** * 拦截器对所有的业务实现类请求之前进行数据源切换 特别注意,由于用到了多数据源,mapper的调用最好只在*serviceimpl,不然调用到非默认数据源的表时,会报表不存在的异常 * * @param joinpoint * @throws throwable */ @before("execution(* com.xxxx.platform.service..*.*serviceimpl.*(..))") public void setdatasoruce(joinpoint joinpoint) throws throwable { class<?> clazz = joinpoint.gettarget().getclass(); string classname = clazz.getname(); if (classutils.isassignable(clazz, proxy.class)) { classname = joinpoint.getsignature().getdeclaringtypename(); } // 对类名含有servera的设置为servera数据源,否则默认为后台的数据源 if (classname.contains(".servera.")) { multipledatasource.setdatasourcekey(dbconstant.data_source_servera); } else if (classname.contains(".serverb.")) { multipledatasource.setdatasourcekey(dbconstant.data_source_serverb); } else { multipledatasource.setdatasourcekey(dbconstant.data_source_op); } } /** * 当操作完成时,释放当前的数据源 如果不释放,频繁点击时会发生数据源冲突,本是另一个数据源的表,结果跑到另外一个数据源去,报表不存在 * * @param joinpoint * @throws throwable */ @after("execution(* com.xxxx.service..*.*serviceimpl.*(..))") public void removedatasoruce(joinpoint joinpoint) throws throwable { multipledatasource.removedatasourcekey(); }} |
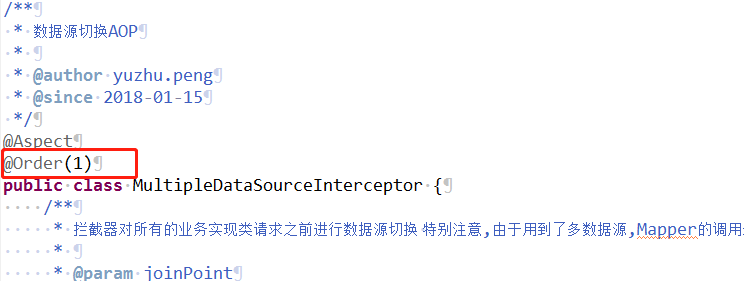
拦截所有的serviceimpl方法,根据方法的全限定名去判断属于那个数据源的功能,然后选择相应的数据源,发放执行完后,释放当前的数据源。注意我用到了spring的 @order,注解,接下来会讲到,当定义多个aop的时候,order是很有用的。
其他:
一开始项目中并没有引入事务,所以一切都ok,每次都能访问到正确的数据源,当加入spring的事务管理后,不能动态切换数据源了(也好像是事务没有生效,反正是二者没有同时有效),后来发现原因是aop的执行顺序问题,所以用到了上边提到的spring的order:


order越小,先被执行。至此,既可以动态切换数据源,又可以成功用事务(在同一个数据源)。
以上就是本文的全部内容,希望对大家的学习有所帮助,也希望大家多多支持服务器之家。
原文链接:https://www.cnblogs.com/zackzhuzi/archive/2018/01/26/8359940.html


