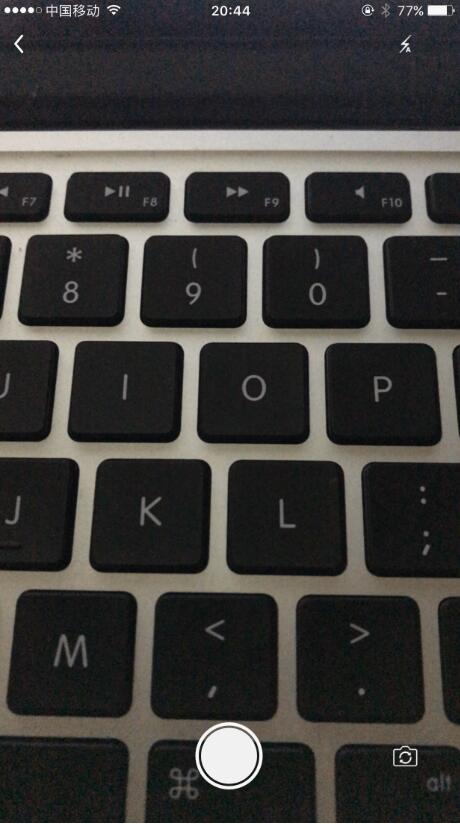
本文实例为大家分享了iOS 10自定义相机功能的具体代码,供大家参考,具体内容如下
直接上代码
|
1
2
3
4
5
6
7
8
9
10
11
12
13
14
15
16
17
18
19
20
21
22
23
24
25
26
27
28
29
30
31
32
33
34
35
36
37
38
39
40
41
42
43
44
45
46
47
48
49
50
51
52
53
54
55
56
57
58
59
60
61
62
63
64
65
66
67
68
69
70
71
72
73
74
75
76
77
78
79
80
81
82
83
84
85
86
87
88
89
90
91
92
93
94
95
96
97
98
99
100
101
102
103
104
105
106
107
108
109
110
111
112
113
114
115
116
117
118
119
120
121
122
123
124
125
126
127
128
129
130
131
132
133
134
135
136
137
138
139
140
141
142
143
144
145
146
147
148
149
150
151
152
153
154
155
156
157
158
159
160
161
162
163
164
165
166
167
168
169
170
171
172
173
174
175
176
177
178
179
180
181
182
183
184
185
186
187
188
189
190
191
192
193
194
195
196
197
198
199
200
201
202
203
204
205
206
207
208
209
210
211
212
213
214
215
216
217
218
219
220
221
222
223
224
225
226
227
228
229
230
231
232
233
234
235
236
237
238
239
240
241
242
243
244
245
246
247
248
249
250
251
252
253
254
255
256
257
258
259
260
261
262
263
264
265
266
267
268
269
270
271
272
273
274
275
276
277
278
279
|
//// TGCameraVC.swift// TGPhotoPicker//// Created by targetcloud on 2017/7/25.// Copyright © 2017年 targetcloud. All rights reserved.// import UIKitimport AVFoundationimport Photos @available(iOS 10.0, *)class TGCameraVC: UIViewController { var callbackPicutureData: ((Data?) -> ())? private var device: AVCaptureDevice? private var input: AVCaptureDeviceInput? private var imageOutput: AVCapturePhotoOutput? private var session: AVCaptureSession? private var previewLayer: AVCaptureVideoPreviewLayer? fileprivate var showImageContainerView: UIView? fileprivate var showImageView: UIImageView? fileprivate var picData: Data? private var flashMode: AVCaptureFlashMode = .auto private weak var flashButton: UIButton? override func viewDidLoad() { super.viewDidLoad() setupCamera() setupUI() if #available(iOS 9.0, *) { let isVCBased = Bundle.main.infoDictionary?["UIViewControllerBasedStatusBarAppearance"] as? Bool ?? false if !isVCBased{ UIApplication.shared.setStatusBarHidden(false, with: .none) } }else { UIApplication.shared.statusBarStyle = .lightContent UIApplication.shared.setStatusBarHidden(false, with: .none) } } override var prefersStatusBarHidden: Bool{ return false } override var preferredStatusBarStyle: UIStatusBarStyle { return .lightContent } private func setupCamera() { AVCaptureDevice.requestAccess(forMediaType: AVMediaTypeVideo) { success in if !success { let alertVC = UIAlertController(title: TGPhotoPickerConfig.shared.cameraUsage, message: TGPhotoPickerConfig.shared.cameraUsageTip, preferredStyle: .actionSheet) alertVC.addAction(UIAlertAction(title: TGPhotoPickerConfig.shared.confirmTitle, style: .default, handler: nil)) self.present(alertVC, animated: true, completion: nil) } } device = cameraWithPosistion(.back) input = try? AVCaptureDeviceInput(device: device) guard input != nil else { return } imageOutput = AVCapturePhotoOutput() session = AVCaptureSession() session?.beginConfiguration() session?.sessionPreset = TGPhotoPickerConfig.shared.sessionPreset if session!.canAddInput(input) { session!.addInput(input) } if session!.canAddOutput(imageOutput) { session!.addOutput(imageOutput) } previewLayer = AVCaptureVideoPreviewLayer(session: session) previewLayer?.frame = view.bounds previewLayer?.videoGravity = TGPhotoPickerConfig.shared.videoGravity view.layer.addSublayer(previewLayer!) session?.commitConfiguration() session?.startRunning() } private func cameraWithPosistion(_ position: AVCaptureDevicePosition) -> AVCaptureDevice { let type = AVCaptureDeviceType(rawValue: TGPhotoPickerConfig.shared.captureDeviceType.rawValue) return AVCaptureDevice.defaultDevice(withDeviceType: type, mediaType: AVMediaTypeVideo, position: position) } private func setupUI() { let takeButton = UIButton(frame: CGRect(x: 0, y: 0, width: TGPhotoPickerConfig.shared.takeWH, height: TGPhotoPickerConfig.shared.takeWH)) takeButton.center = CGPoint(x: UIScreen.main.bounds.width / 2, y: UIScreen.main.bounds.height - TGPhotoPickerConfig.shared.buttonEdge.bottom) takeButton.setImage(UIImage.size(width: TGPhotoPickerConfig.shared.takeWH, height: TGPhotoPickerConfig.shared.takeWH).border(width: 3).border(color: .white).color(.clear).corner(radius: TGPhotoPickerConfig.shared.takeWH / 2).image + UIImage.size(width: TGPhotoPickerConfig.shared.takeWH - 10, height: TGPhotoPickerConfig.shared.takeWH - 10).color(UIColor(white: 0.95, alpha: 1) ).corner(radius: (TGPhotoPickerConfig.shared.takeWH - 10) / 2).image, for: .normal) takeButton.setImage(UIImage.size(width: TGPhotoPickerConfig.shared.takeWH, height: TGPhotoPickerConfig.shared.takeWH).border(width: 3).border(color: .white).color(.clear).corner(radius: TGPhotoPickerConfig.shared.takeWH / 2).image + UIImage.size(width: TGPhotoPickerConfig.shared.takeWH - 10, height: TGPhotoPickerConfig.shared.takeWH - 10).color(UIColor(white: 0.8, alpha: 1) ).corner(radius: (TGPhotoPickerConfig.shared.takeWH - 10) / 2).image, for: .highlighted) takeButton.addTarget(self, action: #selector(takePhotoAction), for: .touchUpInside) view.addSubview(takeButton) let cameraChangeButton = UIButton(frame: CGRect(x: 0, y: 0, width: TGPhotoPickerConfig.shared.takeWH * 0.6, height: TGPhotoPickerConfig.shared.takeWH * 0.6)) cameraChangeButton.setImage(TGPhotoPickerConfig.getImageNo2x3xSuffix("camera"), for: .normal) cameraChangeButton.center = CGPoint(x: UIScreen.main.bounds.width - TGPhotoPickerConfig.shared.buttonEdge.right, y: takeButton.center.y) cameraChangeButton.addTarget(self, action: #selector(changeCameraPositionAction), for: .touchUpInside) cameraChangeButton.contentMode = .scaleAspectFit view.addSubview(cameraChangeButton) let flashChangeButton = UIButton(frame: CGRect(x: 0, y: 0, width: TGPhotoPickerConfig.shared.takeWH * 0.5, height: TGPhotoPickerConfig.shared.takeWH * 0.5)) flashChangeButton.center = CGPoint(x: cameraChangeButton.center.x, y: TGPhotoPickerConfig.shared.buttonEdge.top) flashChangeButton.setImage(TGPhotoPickerConfig.getImageNo2x3xSuffix("flashauto"), for: .normal) flashChangeButton.addTarget(self, action: #selector(flashChangeAction), for: .touchUpInside) flashChangeButton.contentMode = .scaleAspectFit flashButton = flashChangeButton view.addSubview(flashChangeButton) let backButton = UIButton(frame: CGRect(x: 0, y: 0, width: TGPhotoPickerConfig.shared.takeWH * 0.4, height: TGPhotoPickerConfig.shared.takeWH * 0.4)) backButton.center = CGPoint(x: TGPhotoPickerConfig.shared.buttonEdge.left , y: flashChangeButton.center.y) backButton.setImage(UIImage.size(width: TGPhotoPickerConfig.shared.takeWH * 0.4, height: TGPhotoPickerConfig.shared.takeWH * 0.4) .corner(radius: TGPhotoPickerConfig.shared.takeWH * 0.2) .color(.clear) .border(color: UIColor.white.withAlphaComponent(0.7)) .border(width: TGPhotoPickerConfig.shared.isShowBorder ? TGPhotoPickerConfig.shared.checkboxLineW : 0) .image .with({ context in context.setLineCap(.round) UIColor.white.setStroke() context.setLineWidth(TGPhotoPickerConfig.shared.checkboxLineW) let WH = TGPhotoPickerConfig.shared.takeWH * 0.4 context.move(to: CGPoint(x: WH * 0.6, y: WH * 0.2)) context.addLine(to: CGPoint(x: WH * 0.35, y: WH * 0.5)) context.move(to: CGPoint(x: WH * 0.35, y: WH * 0.5)) context.addLine(to: CGPoint(x: WH * 0.6, y: WH * 0.8)) context.strokePath() }), for: .normal) backButton.contentMode = .scaleAspectFit backButton.addTarget(self, action: #selector(backAction), for: .touchUpInside) view.addSubview(backButton) showImageContainerView = UIView(frame: view.bounds) showImageContainerView?.backgroundColor = TGPhotoPickerConfig.shared.previewBGColor view.addSubview(showImageContainerView!) let height = showImageContainerView!.bounds.height - TGPhotoPickerConfig.shared.takeWH - TGPhotoPickerConfig.shared.buttonEdge.bottom - TGPhotoPickerConfig.shared.previewPadding * 2 showImageView = UIImageView(frame: CGRect(x: TGPhotoPickerConfig.shared.previewPadding, y: TGPhotoPickerConfig.shared.previewPadding * 2, width: showImageContainerView!.bounds.width - 2 * TGPhotoPickerConfig.shared.previewPadding, height: height)) showImageView?.contentMode = .scaleAspectFit showImageContainerView?.addSubview(showImageView!) showImageContainerView?.isHidden = true let giveupButton = createImageOperatorButton(nil, CGPoint(x: TGPhotoPickerConfig.shared.takeWH * 1.5, y: showImageContainerView!.bounds.height - TGPhotoPickerConfig.shared.takeWH * 1.5), TGPhotoPickerConfig.shared.getCheckboxImage(true, true, .circle, TGPhotoPickerConfig.shared.takeWH * 0.7).unselect) giveupButton.addTarget(self, action: #selector(giveupImageAction), for: .touchUpInside) showImageContainerView?.addSubview(giveupButton) let ensureButton = createImageOperatorButton(nil, CGPoint(x: showImageContainerView!.bounds.width - TGPhotoPickerConfig.shared.takeWH * 1.5, y: showImageContainerView!.bounds.height - TGPhotoPickerConfig.shared.takeWH * 1.5), TGPhotoPickerConfig.shared.getCheckboxImage(true, false, .circle, TGPhotoPickerConfig.shared.takeWH * 0.7).select) ensureButton.addTarget(self, action: #selector(useImageAction), for: .touchUpInside) showImageContainerView?.addSubview(ensureButton) } private func createImageOperatorButton(_ title: String?, _ center: CGPoint, _ img: UIImage?) -> UIButton { let btn = UIButton(frame: CGRect(x: 0, y: 0, width: TGPhotoPickerConfig.shared.takeWH * 0.7, height: TGPhotoPickerConfig.shared.takeWH * 0.7)) btn.center = center btn.setTitle(title, for: .normal) btn.setImage(img, for: .normal) btn.contentMode = .scaleAspectFit return btn } @objc private func flashChangeAction() { switch flashMode { case .auto: flashMode = .on flashButton?.setImage(TGPhotoPickerConfig.getImageNo2x3xSuffix("flash"), for: .normal) case .on: flashMode = .off flashButton?.setImage(TGPhotoPickerConfig.getImageNo2x3xSuffix("flashno"), for: .normal) case .off: flashMode = .auto flashButton?.setImage(TGPhotoPickerConfig.getImageNo2x3xSuffix("flashauto"), for: .normal) } } @objc private func backAction() { dismiss(animated: true, completion: nil) } @objc private func takePhotoAction() { let connection = imageOutput?.connection(withMediaType: AVMediaTypeVideo) guard connection != nil else { return } let photoSettings = AVCapturePhotoSettings() photoSettings.flashMode = flashMode imageOutput?.capturePhoto(with: photoSettings, delegate: self) } @objc private func changeCameraPositionAction() { let animation = CATransition() animation.duration = 0.5 animation.timingFunction = CAMediaTimingFunction(name: kCAMediaTimingFunctionEaseInEaseOut) animation.type = TGPhotoPickerConfig.shared.transitionType let newDevice: AVCaptureDevice! let newInput: AVCaptureDeviceInput? let position = input?.device.position if position == .front { newDevice = cameraWithPosistion(.back) animation.subtype = kCATransitionFromLeft } else { newDevice = cameraWithPosistion(.front) animation.subtype = kCATransitionFromRight } newInput = try? AVCaptureDeviceInput(device: newDevice) guard newInput != nil else{ return } previewLayer?.add(animation, forKey: nil) session?.beginConfiguration() session?.removeInput(input) if session!.canAddInput(newInput) { session?.addInput(newInput!) input = newInput } else { session?.addInput(input) } session?.commitConfiguration() } @objc private func giveupImageAction() { showImageView?.image = UIImage() showImageContainerView?.isHidden = true } @objc private func useImageAction() { callbackPicutureData?(picData) dismiss(animated: true, completion: nil) }} @available(iOS 10.0, *)extension TGCameraVC: AVCapturePhotoCaptureDelegate { func capture(_ captureOutput: AVCapturePhotoOutput, didFinishProcessingPhotoSampleBuffer photoSampleBuffer: CMSampleBuffer?, previewPhotoSampleBuffer: CMSampleBuffer?, resolvedSettings: AVCaptureResolvedPhotoSettings, bracketSettings: AVCaptureBracketedStillImageSettings?, error: Error?) { if error != nil { print("error = \(String(describing: error?.localizedDescription))") } else { if let imageData = AVCapturePhotoOutput.jpegPhotoDataRepresentation(forJPEGSampleBuffer: photoSampleBuffer!, previewPhotoSampleBuffer: previewPhotoSampleBuffer){ picData = imageData showImageContainerView?.isHidden = false showImageView?.image = UIImage(data: imageData) if TGPhotoPickerConfig.shared.saveImageToPhotoAlbum{ self.saveImageToPhotoAlbum(UIImage(data: imageData)!) } } } } fileprivate func saveImageToPhotoAlbum(_ savedImage:UIImage){ UIImageWriteToSavedPhotosAlbum(savedImage, self, #selector(imageDidFinishSavingWithErrorContextInfo), nil) } @objc fileprivate func imageDidFinishSavingWithErrorContextInfo(image:UIImage,error:NSError?,contextInfo:UnsafeMutableRawPointer?){ if canUseAlbum(){ let msg = (error != nil) ? TGPhotoPickerConfig.shared.saveImageFailTip : TGPhotoPickerConfig.shared.saveImageSuccessTip let alert = UIAlertView(title: TGPhotoPickerConfig.shared.saveImageTip, message: msg, delegate: self, cancelButtonTitle: TGPhotoPickerConfig.shared.confirmTitle) alert.show() } } fileprivate func canUseAlbum()-> Bool{ if PHPhotoLibrary.authorizationStatus() != PHAuthorizationStatus.authorized { let alertView = UIAlertView(title: TGPhotoPickerConfig.shared.PhotoLibraryUsage, message: TGPhotoPickerConfig.shared.PhotoLibraryUsageTip, delegate: nil, cancelButtonTitle: TGPhotoPickerConfig.shared.confirmTitle, otherButtonTitles: TGPhotoPickerConfig.shared.cancelTitle) alertView.tag = TGPhotoPickerConfig.shared.alertViewTag alertView.show() return false }else{ return true } }} |
效果如下

完整使用DEMO见:点击打开链接
以上就是本文的全部内容,希望对大家的学习有所帮助,也希望大家多多支持服务器之家。
原文链接:https://blog.csdn.net/callzjy/article/details/77149872


