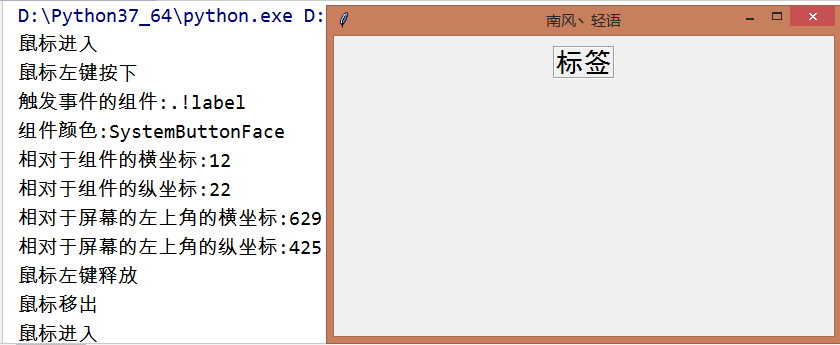
1、绑定鼠标事件并获取事件属性
|
1
2
3
4
5
6
7
8
9
10
11
12
13
14
15
16
17
18
19
20
21
22
23
24
25
26
27
28
29
30
31
32
33
34
35
36
37
38
39
40
41
42
43
44
45
46
47
48
49
50
51
52
53
54
55
56
57
58
59
60
61
62
63
64
65
66
67
68
69
70
|
# -*- encoding=utf-8 -*-import tkinterfrom tkinter import *def left_mouse_down(event): print('鼠标左键按下') # 事件的属性 widget = event.widget print('触发事件的组件:{}'.format(widget)) print('组件颜色:{}'.format(widget.cget('bg'))) widget_x = event.x # 相对于组件的横坐标x print('相对于组件的横坐标:{}'.format(widget_x)) widget_y = event.y # 相对于组件的纵坐标y print('相对于组件的纵坐标:{}'.format(widget_y)) x_root = event.x_root # 相对于屏幕的左上角的横坐标 print('相对于屏幕的左上角的横坐标:{}'.format(x_root)) y_root = event.y_root # 相对于屏幕的左上角的纵坐标 print('相对于屏幕的左上角的纵坐标:{}'.format(y_root))def left_mouse_up(event): print('鼠标左键释放')def moving_mouse(event): print('鼠标左键按下并移动')def moving_into(event): print('鼠标进入')def moving_out(event): print('鼠标移出')def right_mouse_down(event): print('鼠标右键按下')def right_mouse_up(event): print('鼠标右键释放')def pulley_up(event): print('滑轮向上滚动')def focus(event): print('聚焦事件')def unfocus(event): print('失焦事件')if __name__ == '__main__': win = tkinter.tk() # 窗口 win.title('南风丶轻语') # 标题 screenwidth = win.winfo_screenwidth() # 屏幕宽度 screenheight = win.winfo_screenheight() # 屏幕高度 width = 500 height = 300 x = int((screenwidth - width) / 2) y = int((screenheight - height) / 2) win.geometry('{}x{}+{}+{}'.format(width, height, x, y)) # 大小以及位置 label = label(text='标签', relief='g', font=('黑体', 20)) label.pack(pady=10) label.bind('<button-1>', left_mouse_down) # 鼠标左键按下 label.bind('<buttonrelease-1>', left_mouse_up) # 鼠标左键释放 label.bind('<button-3>', right_mouse_down) # 鼠标右键按下 label.bind('<buttonrelease-3>', right_mouse_up) # 鼠标右键释放 label.bind('<b1-motion>', moving_mouse) # 鼠标左键按下并移动 label.bind('<enter>', moving_into) # 鼠标移入事件 label.bind('<leave>', moving_out) # 鼠标移出事件 label.bind('<focusin>', focus) # 聚焦事件 label.bind('<focusout>', unfocus) # 失焦事件 label.focus_set() # 直接聚焦 entry().pack() win.mainloop() |

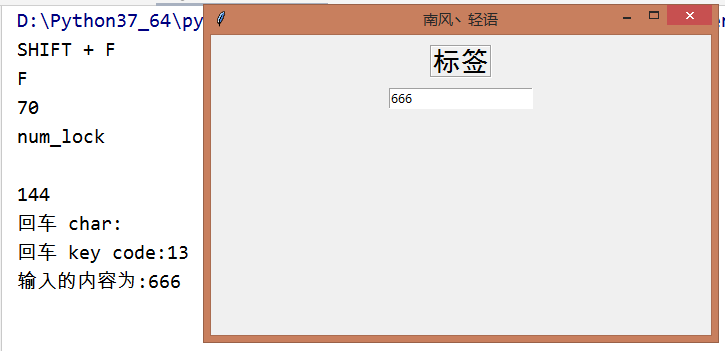
2、绑定键盘事件并获取事件属性
|
1
2
3
4
5
6
7
8
9
10
11
12
13
14
15
16
17
18
19
20
21
22
23
24
25
26
27
28
29
30
31
32
33
34
35
36
37
38
39
40
41
42
43
44
45
46
47
48
49
50
51
|
# -*- encoding=utf-8 -*-import tkinterfrom tkinter import *def keyboard_event(event): char = event.char print('回车 char:{}'.format(char)) key_code = event.keycode print('回车 key code:{}'.format(key_code))def entry_enter(event): print('输入的内容为:' + entry.get())def shift_f(event): print('shift + f') print(event.char) print(event.keycode)def num_lock(event): print('num_lock') print(event.char) print(event.keycode)if __name__ == '__main__': win = tkinter.tk() # 窗口 win.title('南风丶轻语') # 标题 screenwidth = win.winfo_screenwidth() # 屏幕宽度 screenheight = win.winfo_screenheight() # 屏幕高度 width = 500 height = 300 x = int((screenwidth - width) / 2) y = int((screenheight - height) / 2) win.geometry('{}x{}+{}+{}'.format(width, height, x, y)) # 大小以及位置 label = label(text='标签', relief='g', font=('黑体', 20)) label.pack(pady=10) label.focus_set() label.bind('<return>', keyboard_event) # 按下回车 label.bind('<shift f>', shift_f) label.bind('<num_lock>', num_lock) entry = entry() entry.pack() entry.bind('<return>', entry_enter) # 按下回车 win.mainloop() |

以上就是python tkinter之bind(绑定事件)的使用示例的详细内容,更多关于python tkinter bind(绑定事件)的资料请关注服务器之家其它相关文章!
原文链接:https://www.cnblogs.com/rainbow-tan/p/14086636.html


