有时,为了方便看数据的变化情况,需要画一个动态图来看整体的变化情况。主要就是用Matplotlib库。
首先,说明plot函数的说明。
plt.plot(x,y,format_string,**kwargs)
x是x轴数据,y是y轴数据。x与y维度一定要对应。
format_string控制曲线的格式字串
下面详细说明:
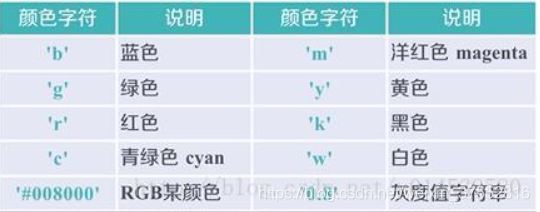
- color(c):线条颜色
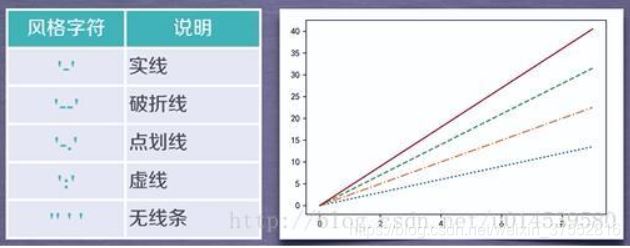
- linestyle(ls):线条样式
- linewidth(lw):线的粗细
关于标记的一些参数:
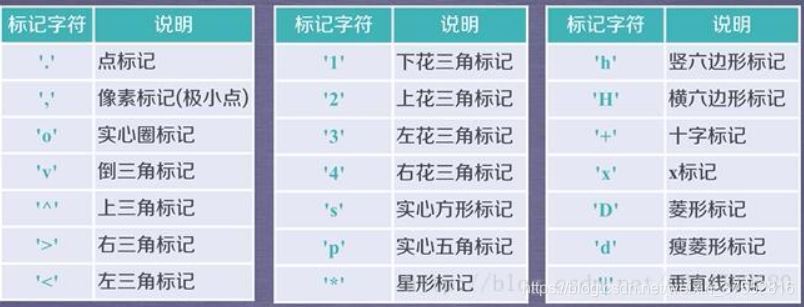
- marker:标记样式
- markeredgecolor(mec):标记边缘颜色
- markeredgewidth(mew):标记边缘宽度
- markerfacecolor(mfc):标记中心颜色
- markersize(ms):标记大小
另外,marker关键字参数可以和color以及linestyle这两个关键字参数合并为一个字符串。
例如:‘ro-'表示红色的直线,标记为圆形
线条color颜色:

线条样式(linestyle):

标记(marker)参数:

程序demo如下:
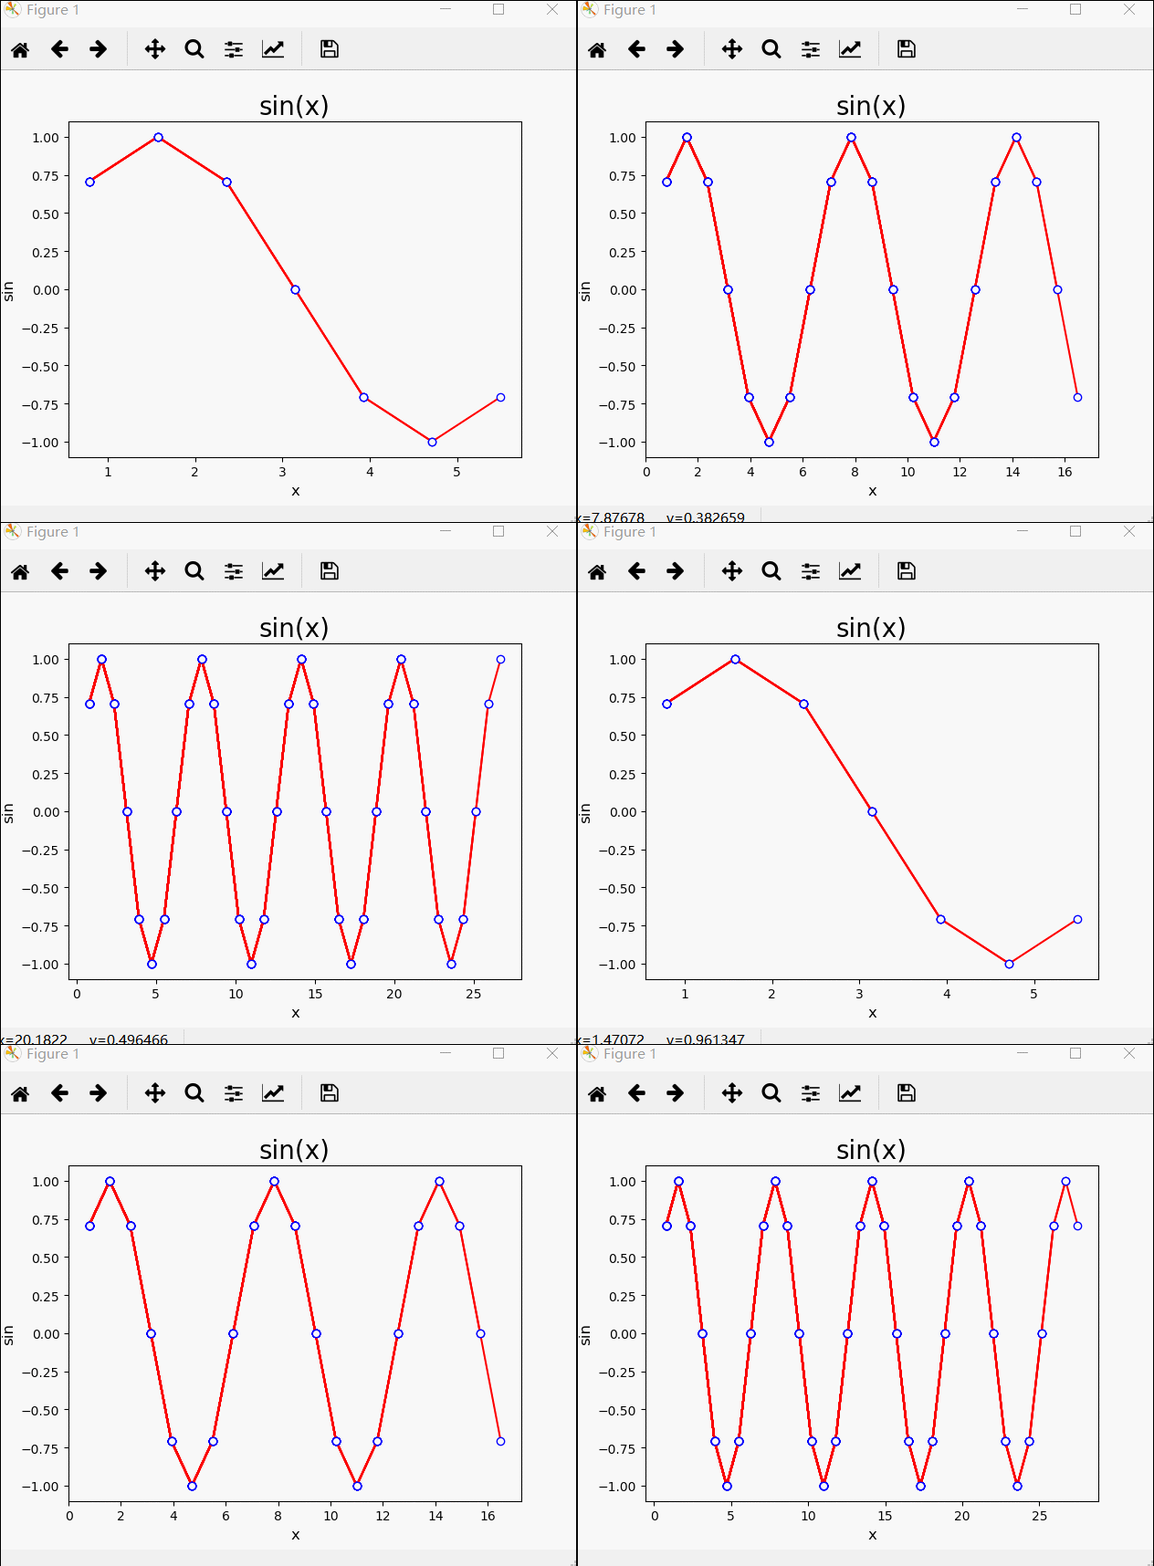
得到的结果是循环的sin(x)的折线图
'''
动态折线图演示示例
'''

import numpy as np
import matplotlib.pyplot as plt

plt.ion()
plt.figure(1)
t_list = []
result_list = []
t = 0

while True:
 if t >= 10 * np.pi:
  plt.clf()
  t = 0
  t_list.clear()
  result_list.clear()
 else:
  t += np.pi / 4
  t_list.append(t)
  result_list.append(np.sin(t))
  plt.plot(t_list, result_list,c='r',ls='-', marker='o', mec='b',mfc='w') ## 保存历史数据
  #plt.plot(t, np.sin(t), 'o')
  plt.pause(0.1)
得到的结果如下:

到此这篇关于python学习之使用Matplotlib画实时的动态折线图的示例代码的文章就介绍到这了,更多相关Matplotlib 实时动态折线图内容请搜索服务器之家以前的文章或继续浏览下面的相关文章希望大家以后多多支持服务器之家!
参考博客链接:https://blog.csdn.net/zhanghao3389/article/details/82685072
https://blog.csdn.net/u013468614/article/details/58689735
到此这篇关于python学习之使用Matplotlib画实时的动态折线图的示例代码的文章就介绍到这了,更多相关Matplotlib 实时动态折线图内容请搜索服务器之家以前的文章或继续浏览下面的相关文章希望大家以后多多支持服务器之家!
原文链接:https://blog.csdn.net/weixin_37552816/article/details/89555200


