本文大家分享了mysql5.7安装配置教程,供大家参考,具体内容如下
第一步:获取mysql YUM源
进入mysql官网获取RPM包下载地址
https://dev.mysql.com/downloads/repo/yum/
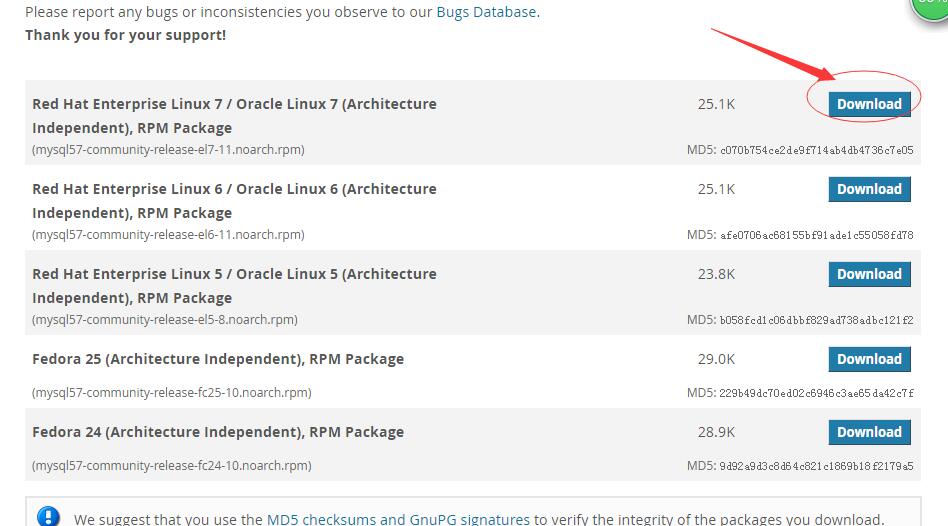
点击 下载
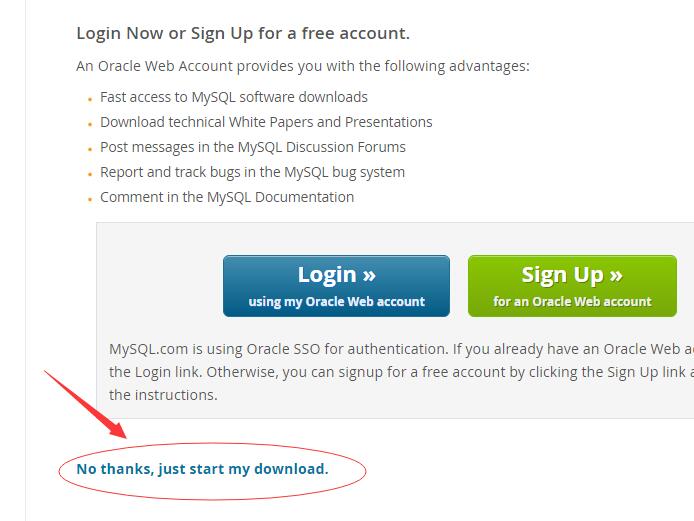
右击 复制链接地址https://dev.mysql.com/get/mysql57-community-release-el7-11.noarch.rpm
得到这个 这个就是Yum仓库的rpm包 其实就是一个下载地址
第二步:下载和安装mysql源
先下载 mysql源安装包
|
1
|
[root@localhost ~]# wget https://dev.mysql.com/get/mysql57-community-release-el7-11.noarch.rpm |
-bash: wget: 未找到命令
我们先安装下wget
|
1
|
yum -y install wget |
然后执行
|
1
|
wgethttps://dev.mysql.com/get/mysql57-community-release-el7-11.noarch.rpm |
安装mysql源
|
1
|
yum -y localinstall mysql57-community-release-el7-11.noarch.rpm |
第三步:在线安装Mysql
|
1
|
yum -y install mysql-community-server |
下载的东西比较多 要稍微等会;
第四步:启动Mysql服务
|
1
|
systemctl start mysqld |
第五步:设置开机启动
|
1
2
|
[root@localhost ~]# systemctl enable mysqld[root@localhost ~]# systemctl daemon-reload |
第六步:修改root本地登录密码
mysql安装完成之后,在/var/log/mysqld.log文件中给root生成了一个临时的默认密码。
|
1
|
[root@localhost ~]# vi /var/log/mysqld.log |
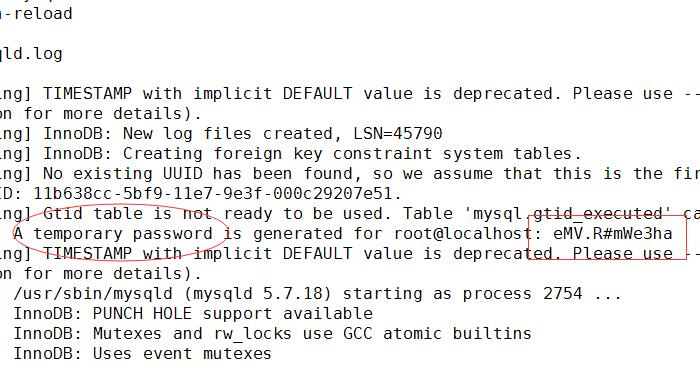
这里的临时密码 eMV.R#mWe3ha
|
1
2
|
[root@localhost ~]# mysql -u root -pEnter password: |
输入临时密码 进入mysql命令行;
|
1
2
|
mysql> ALTER USER 'root'@'localhost' IDENTIFIED BY 'Caofeng2012@';Query OK, 0 rows affected (0.00 sec) |
修改密码为Caofeng2012@ (备注 mysql5.7默认密码策略要求密码必须是大小写字母数字特殊字母的组合,至少8位)
第七步:设置允许远程登录
Mysql默认不允许远程登录,我们需要设置下,并且防火墙开放3306端口;
|
1
2
3
4
|
mysql> GRANT ALL PRIVILEGES ON *.* TO 'root'@'%' IDENTIFIED BY 'Caofeng2012@' WITH GRANT OPTION;Query OK, 0 rows affected, 1 warning (0.01 sec)mysql> exit;Bye |
退出下;
|
1
2
3
4
5
|
[root@localhost ~]# firewall-cmd --zone=public --add-port=3306/tcp --permanentsuccess[root@localhost ~]# firewall-cmd --reloadsuccess[root@localhost ~]# |
开放3306端口
第八步:配置默认编码为utf8
修改/etc/my.cnf配置文件,在[mysqld]下添加编码配置,如下所示:
|
1
2
3
4
5
|
[mysqld]character_set_server=utf8init_connect='SET NAMES utf8'[root@localhost ~]# vi /etc/my.cnf |
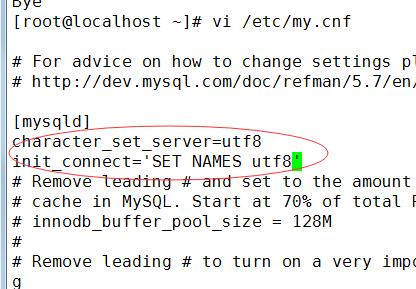
编辑保存完 重启mysql服务;
|
1
2
|
[root@localhost ~]# systemctl restart mysqld[root@localhost ~]# |
查看下编码:
|
1
2
3
4
5
6
7
8
9
10
11
12
13
14
15
16
17
18
19
20
|
mysql> show variables like '%character%';+--------------------------+----------------------------+| Variable_name | Value |+--------------------------+----------------------------+| character_set_client | utf8 || character_set_connection | utf8 || character_set_database | utf8 || character_set_filesystem | binary || character_set_results | utf8 || character_set_server | utf8 || character_set_system | utf8 || character_sets_dir | /usr/share/mysql/charsets/ |+--------------------------+----------------------------+8 rows in set (0.00 sec) |
第九步:测试
我们用本机的sqlyog远程连接下虚拟机里的mysql
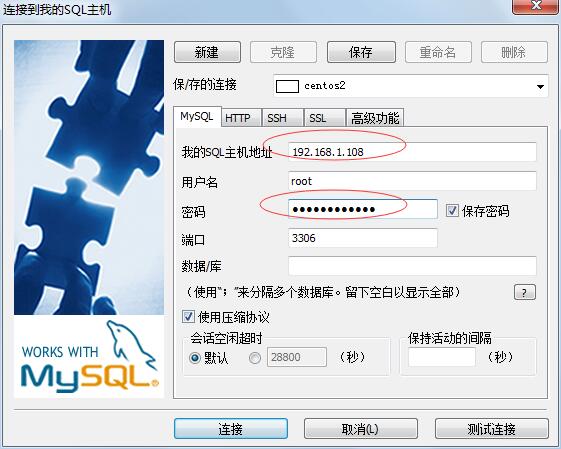
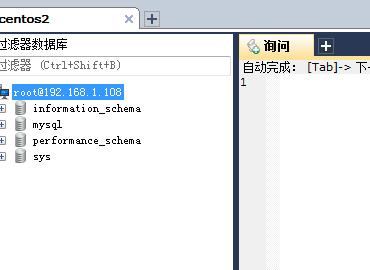
OK 至此 Mysql安装配置完毕;
以上就是本文的全部内容,希望对大家的学习有所帮助,也希望大家多多支持服务器之家。
原文链接:http://www.cnblogs.com/ITMan-blogs/p/7503464.html


