前言:如果你是初学者,请完全按照我的教程以及代码来搭建(文末会附上完整的项目代码包,你可以直接下载我提供的完整项目代码包然后自行体验!),为了照顾初学者所以贴图比较多,请耐心跟着教程来,希望这个项目Demo能给你一些帮助,如果觉得写的还可以请给个关注和点赞,谢谢!
题外话:这是我第一篇用markdown来写的博文,格式不好的地方请见谅
一、pom.xml和application.yml
1、pom.xml中添加相关依赖,这里我把我的pom.xml代码贴出来
- <?xml version="1.0" encoding="UTF-8"?>
- <project xmlns="http://maven.apache.org/POM/4.0.0" xmlns:xsi="http://www.w3.org/2001/XMLSchema-instance"
- xsi:schemaLocation="http://maven.apache.org/POM/4.0.0 https://maven.apache.org/xsd/maven-4.0.0.xsd">
- <modelVersion>4.0.0</modelVersion>
- <parent>
- <groupId>org.springframework.boot</groupId>
- <artifactId>spring-boot-starter-parent</artifactId>
- <version>2.4.3</version>
- <relativePath/> <!-- lookup parent from repository -->
- </parent>
- <groupId>com.example</groupId>
- <artifactId>study</artifactId>
- <version>0.0.1-SNAPSHOT</version>
- <name>study</name>
- <description>Demo project for Spring Boot</description>
- <properties>
- <!--依赖的版本-->
- <java.version>1.8</java.version>
- <mysql.version>8.0.13</mysql.version>
- <mybatisPlus.version>3.4.1</mybatisPlus.version>
- <druid.version>1.0.9</druid.version>
- <swagger.version>2.9.2</swagger.version>
- <hutool.version>5.5.8</hutool.version>
- </properties>
- <dependencies>
- <dependency>
- <groupId>org.springframework.boot</groupId>
- <artifactId>spring-boot-starter-web</artifactId>
- </dependency>
- <dependency>
- <groupId>org.projectlombok</groupId>
- <artifactId>lombok</artifactId>
- <optional>true</optional>
- </dependency>
- <dependency>
- <groupId>org.springframework.boot</groupId>
- <artifactId>spring-boot-starter-test</artifactId>
- <scope>test</scope>
- </dependency>
- <!--mysql-->
- <dependency>
- <groupId>mysql</groupId>
- <artifactId>mysql-connector-java</artifactId>
- <scope>runtime</scope>
- <version>${mysql.version}</version>
- </dependency>
- <!-- MyBatis-Plus-->
- <dependency>
- <groupId>com.baomidou</groupId>
- <artifactId>mybatis-plus-boot-starter</artifactId>
- <version>${mybatisPlus.version}</version>
- </dependency>
- <dependency>
- <groupId>com.baomidou</groupId>
- <artifactId>mybatis-plus-generator</artifactId>
- <version>${mybatisPlus.version}</version>
- </dependency>
- <!--druid-->
- <dependency>
- <groupId>com.alibaba</groupId>
- <artifactId>druid</artifactId>
- <version>${druid.version}</version>
- </dependency>
- <!--swagger2-->
- <dependency>
- <groupId>io.springfox</groupId>
- <artifactId>springfox-swagger2</artifactId>
- <version>${swagger.version}</version>
- </dependency>
- <dependency>
- <groupId>io.springfox</groupId>
- <artifactId>springfox-swagger-ui</artifactId>
- <version>${swagger.version}</version>
- </dependency>
- <!--hutool-->
- <dependency>
- <groupId>cn.hutool</groupId>
- <artifactId>hutool-all</artifactId>
- <version>${hutool.version}</version>
- </dependency>
- </dependencies>
- <build>
- <plugins>
- <plugin>
- <groupId>org.springframework.boot</groupId>
- <artifactId>spring-boot-maven-plugin</artifactId>
- <configuration>
- <excludes>
- <exclude>
- <groupId>org.projectlombok</groupId>
- <artifactId>lombok</artifactId>
- </exclude>
- </excludes>
- </configuration>
- </plugin>
- </plugins>
- </build>
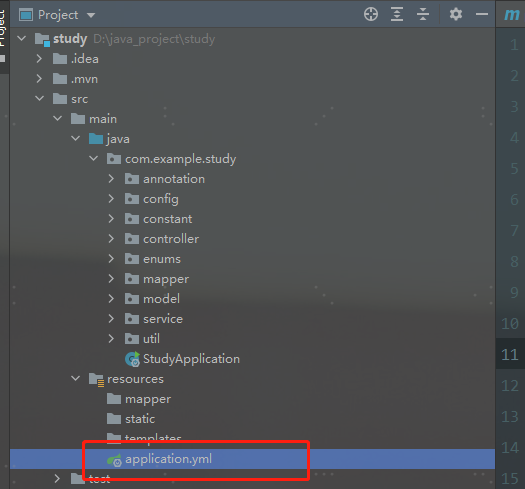
2、在resources下新建application.yml文件,并添加如下配置
- # 配置端口
- server:
- port: 8080
- #----------------druid数据源配置-----------------------
- spring:
- datasource:
- type: com.alibaba.druid.pool.DruidDataSource
- druid:
- #这里跟pom里面mysql-connector版本相关8.0之后用com.mysql.cj.jdbc.Driver,之前用com.mysql.jdbc.Driver
- driver-class-name: com.mysql.cj.jdbc.Driver
- #这里改成你自己的数据库名称以及账号和密码
- url: jdbc:mysql://127.0.0.1:3306/study?serverTimezone=Asia/Shanghai&useUnicode=true&characterEncoding=utf-8&zeroDateTimeBehavior=convertToNull&useSSL=false&allowPublicKeyRetrieval=true
- username: root
- password: 123456
- initialSize: 10
- minIdle: 10
- maxActive: 30
- # 配置获取连接等待超时的时间
- maxWait: 60000
- # 配置间隔多久才进行一次检测,检测需要关闭的空闲连接,单位是毫秒
- timeBetweenEvictionRunsMillis: 60000
- # 配置一个连接在池中最小生存的时间,单位是毫秒
- minEvictableIdleTimeMillis: 300000
- validationQuery: SELECT 1 FROM DUAL
- testWhileIdle: true
- testOnBorrow: false
- testOnReturn: false
- # 打开PSCache,并且指定每个连接上PSCache的大小
- poolPreparedStatements: true
- # 配置监控统计拦截的filters,去掉后监控界面sql无法统计,'wall'用于防火墙
- #filters: stat,wall,log4j
- # 通过connectProperties属性来打开mergeSql功能;慢SQL记录
- connection-properties: druid.stat.mergeSql=true;druid.stat.slowSqlMillis=5000
- # 合并多个DruidDataSource的监控数据
- useGlobalDataSourceStat: true
- #----------------mybatis plus配置-----------------------
- mybatis-plus:
- # xml扫描,多个目录用逗号或者分号分隔(告诉 Mapper 所对应的 XML 文件位置)
- mapper-locations: classpath:mapper/*.xml
- configuration:
- # 是否开启自动驼峰命名规则映射:从数据库列名到Java属性驼峰命名的类似映射
- map-underscore-to-camel-case: true
- # 如果查询结果中包含空值的列,则 MyBatis 在映射的时候,不会映射这个字段
- call-setters-on-nulls: true
- # 这个配置会将执行的sql打印出来,在开发或测试的时候可以用
- log-impl: org.apache.ibatis.logging.stdout.StdOutImpl
- # 实体扫描,多个package用逗号或者分号分隔(这里更改为你的实体类存放路径)
- typeAliasesPackage: com.example.study.model.entity
- global-config:
- db-config:
- #主键类型 AUTO:"数据库ID自增" INPUT:"用户输入ID",ID_WORKER:"全局唯一ID (数字类型唯一ID)", UUID:"全局唯一ID UUID";
- id-type: auto
- #字段策略 IGNORED:"忽略判断" NOT_NULL:"非 NULL 判断") NOT_EMPTY:"非空判断"
- field-strategy: NOT_EMPTY
- #数据库类型
- db-type: MYSQL
- # 逻辑删除配置
- # 删除前
- logic-not-delete-value: 1
- # 删除后
- logic-delete-value: 0
- #----------------swagger配置-----------------------
- swagger:
- #生产环境改为false(改为false后swagger-ui.html则无法访问)
- enable: true
- #解决Swagger2 异常 NumberFormatException:For input string:""
- logging:
- level:
- io:
- swagger:
- models:
- parameters:
- AbstractSerializableParameter: ERROR
二、整合Swagger2
1、添加swagger的配置类SwaggerConfig.java
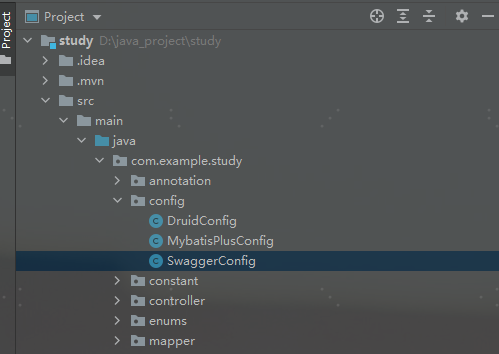
- package com.example.study.config;
- import io.swagger.annotations.Api;
- import org.springframework.boot.autoconfigure.condition.ConditionalOnProperty;
- import org.springframework.context.annotation.Bean;
- import org.springframework.context.annotation.Configuration;
- import springfox.documentation.builders.ApiInfoBuilder;
- import springfox.documentation.builders.PathSelectors;
- import springfox.documentation.builders.RequestHandlerSelectors;
- import springfox.documentation.service.ApiInfo;
- import springfox.documentation.service.ApiKey;
- import springfox.documentation.spi.DocumentationType;
- import springfox.documentation.spring.web.plugins.Docket;
- import springfox.documentation.swagger2.annotations.EnableSwagger2;
- import java.util.ArrayList;
- import java.util.List;
- /**
- * Swagger配置类
- *
- * @author 154594742@qq.com
- * @date: 2021/2/22 10:02:00
- */
- @Configuration
- @EnableSwagger2
- @ConditionalOnProperty(name = "swagger.enable", havingValue = "true")
- public class SwaggerConfig {
- /**
- * 创建API应用
- * apiInfo() 增加API相关信息
- * 通过select()函数返回一个ApiSelectorBuilder实例,用来控制哪些接口暴露给Swagger来展现,
- * 本例采用指定扫描的包路径来定义指定要建立API的目录。
- *
- * @return
- */
- @Bean
- public Docket createRestApi() {
- return new Docket(DocumentationType.SWAGGER_2)
- .apiInfo(this.apiInfo())
- .select()
- //设置选择器,选择带Api接口类的类
- .apis(RequestHandlerSelectors.withClassAnnotation(Api.class))
- //api包扫描
- .apis(RequestHandlerSelectors.basePackage("com.example.study"))
- .paths(PathSelectors.any())
- .build()
- .securitySchemes(securitySchemes());
- }
- /**
- * 创建该API的基本信息(这些基本信息会展现在文档页面中)
- * 访问地址:http://ip:端口/swagger-ui.html
- *
- * @return ApiInfo
- */
- private ApiInfo apiInfo() {
- return new ApiInfoBuilder().title("demo项目")
- .description("demo项目API文档")
- .termsOfServiceUrl("http://localhost")
- .version("1.0")
- .build();
- }
- private List<ApiKey> securitySchemes() {
- List<ApiKey> apiKeyList= new ArrayList<>();
- //apiKeyList.add(new ApiKey("token", "令牌", "header"));
- return apiKeyList;
- }
- }
2、新建controller包并且在controller包下新建IndexController.java
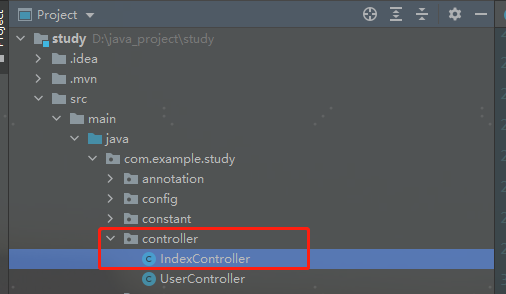
- package com.example.study.controller;
- import io.swagger.annotations.Api;
- import io.swagger.annotations.ApiOperation;
- import org.springframework.beans.factory.annotation.Autowired;
- import org.springframework.web.bind.annotation.GetMapping;
- import org.springframework.web.bind.annotation.RequestMapping;
- import org.springframework.web.bind.annotation.RestController;
- /**
- * 首页控制器
- * @author 154594742@qq.com
- * @date: 2021/2/22 10:02:00
- */
- @Api(tags = "首页控制器")
- @RestController
- public class IndexController {
- @ApiOperation("首页html")
- @GetMapping("/")
- public String index(){
- return "hello index";
- }
- }
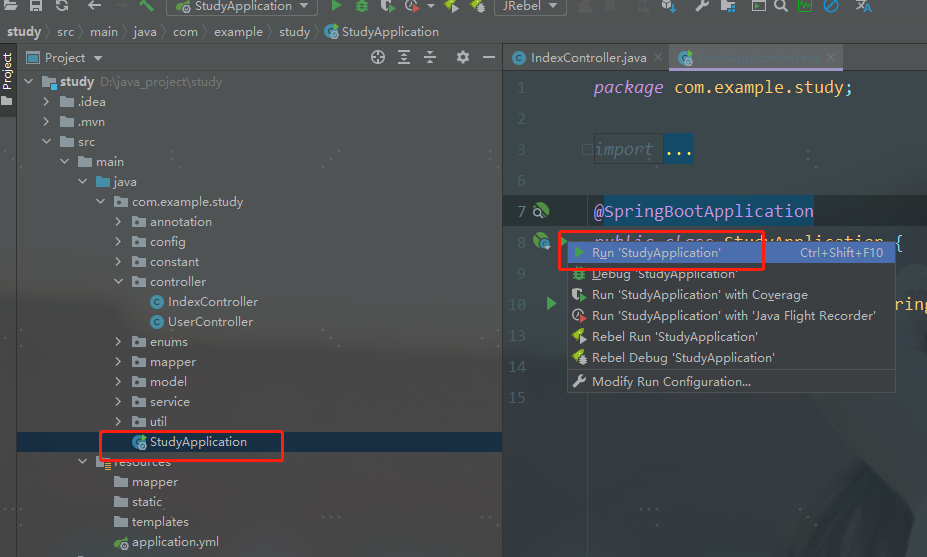
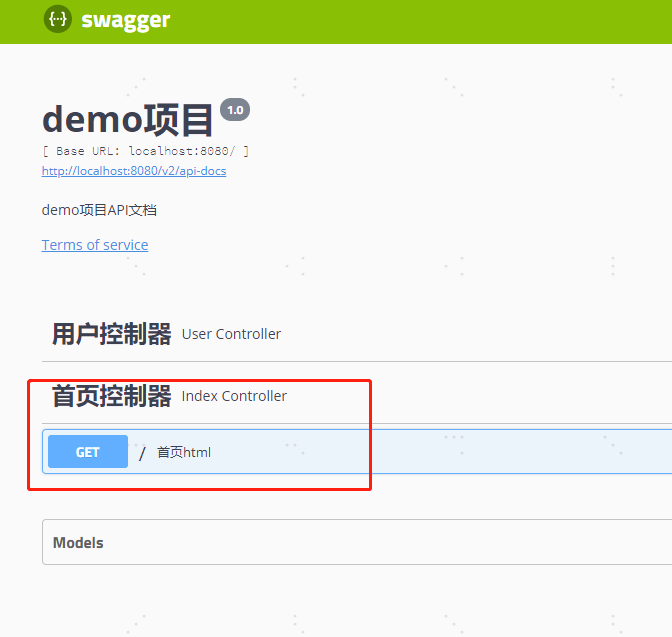
3、启动StudyApplication.java后访问http://localhost:8080/swagger-ui.html,出现第二图所示则表示swagger整合完成
三、整合Mybatis Plus
1、如图创建MybatisPlusConfi.java配置分页插件
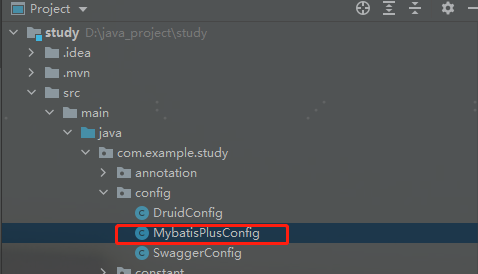
- package com.example.study.config;
- import com.baomidou.mybatisplus.annotation.DbType;
- import com.baomidou.mybatisplus.autoconfigure.ConfigurationCustomizer;
- import com.baomidou.mybatisplus.extension.plugins.MybatisPlusInterceptor;
- import com.baomidou.mybatisplus.extension.plugins.inner.PaginationInnerInterceptor;
- import org.mybatis.spring.annotation.MapperScan;
- import org.springframework.context.annotation.Bean;
- import org.springframework.context.annotation.Configuration;
- /**
- * 配置MybatisPlus分页插件
- *
- * @author 154594742@qq.com
- * @date: 2021/2/22 10:02:00
- */
- @Configuration
- @MapperScan("com.example.study.mapper")
- public class MybatisPlusConfig {
- /**
- * Mybatis-plus3.4.0版本过后使用MybatisPlusInterceptor分页插件
- * 注意:DbType.MYSQL必须为自己使用的数据库类型,否则分页不生效
- */
- @Bean
- public MybatisPlusInterceptor mybatisPlusInterceptor() {
- MybatisPlusInterceptor interceptor = new MybatisPlusInterceptor();
- interceptor.addInnerInterceptor(new PaginationInnerInterceptor(DbType.MYSQL));
- return interceptor;
- }
- /**
- * 设置useDeprecatedExecutor = false 避免缓存出现问题
- * @return
- */
- @Bean
- public ConfigurationCustomizer configurationCustomizer() {
- return configuration -> configuration.setUseDeprecatedExecutor(false);
- }
- }
2、在数据库中创建测试表
- CREATE TABLE `t_user` (
- `id` bigint NOT NULL AUTO_INCREMENT,
- `name` varchar(32) DEFAULT NULL,
- `age` int DEFAULT NULL,
- PRIMARY KEY (`id`)
- ) ENGINE=InnoDB DEFAULT CHARSET=utf8
3、创建实体类UserEntity.java
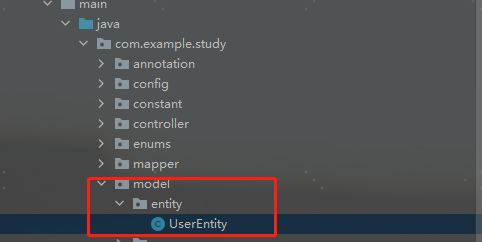
- package com.example.study.model.entity;
- import com.baomidou.mybatisplus.annotation.IdType;
- import com.baomidou.mybatisplus.annotation.TableField;
- import com.baomidou.mybatisplus.annotation.TableId;
- import com.baomidou.mybatisplus.annotation.TableName;
- import io.swagger.annotations.ApiModel;
- import io.swagger.annotations.ApiModelProperty;
- import lombok.AllArgsConstructor;
- import lombok.Data;
- import lombok.NoArgsConstructor;
- import java.io.Serializable;
- /**
- * 用户信息实体类
- *
- * @author 154594742@qq.com
- * @date: 2021/2/22 10:02:00
- */
- @Data
- @NoArgsConstructor
- @AllArgsConstructor
- @ApiModel(value = "UserEntity", description = "用户实体")
- @TableName("t_user")
- public class UserEntity implements Serializable {
- private static final long serialVersionUID = 6928834261563057243L;
- /**
- * 唯一标识,自增主键
- */
- @ApiModelProperty(value = "id")
- @TableId(value = "id", type = IdType.AUTO)
- private Long id;
- /**
- * 姓名
- */
- @ApiModelProperty(value = "姓名")
- @TableField("name")
- private String name;
- /**
- * 年龄
- */
- @ApiModelProperty(value = "年龄")
- @TableField("age")
- private Integer age;
- }
4、创建UserMapper.java
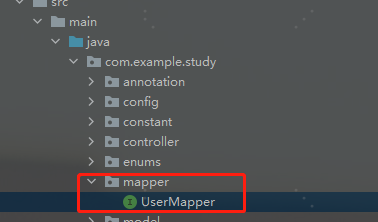
- package com.example.study.mapper;
- import com.baomidou.mybatisplus.core.mapper.BaseMapper;
- import com.example.study.model.entity.UserEntity;
- /**
- * @author 154594742@qq.com
- */
- public interface UserMapper extends BaseMapper<UserEntity> {
- }
5、创建UserService.java
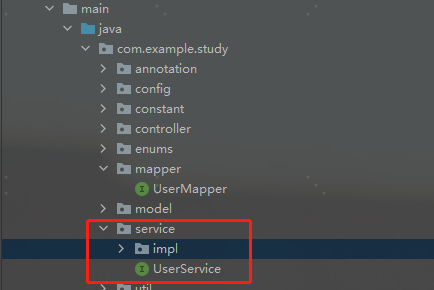
- package com.example.study.service;
- import com.baomidou.mybatisplus.extension.service.IService;
- import com.example.study.model.entity.UserEntity;
- /**
- * @author 154594742@qq.com
- */
- public interface UserService extends IService<UserEntity> {
- }
6、创建UserServiceImpl.java
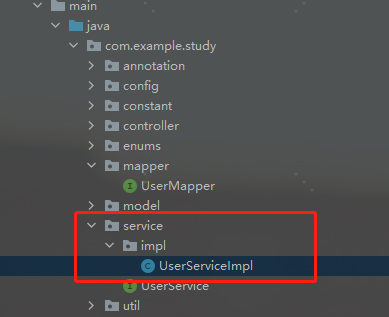
- package com.example.study.service.impl;
- import com.baomidou.mybatisplus.extension.service.impl.ServiceImpl;
- import com.example.study.model.entity.UserEntity;
- import com.example.study.mapper.UserMapper;
- import com.example.study.service.UserService;
- import org.springframework.stereotype.Service;
- /**
- * @author 154594742@qq.com
- */
- @Service
- public class UserServiceImpl extends ServiceImpl<UserMapper, UserEntity> implements UserService {
- }
7、创建UserController.java(这里编译器会提示一些错误暂时不用管,因为缺少一些类的代码)
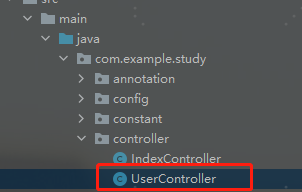
- package com.example.study.controller;
- import com.baomidou.mybatisplus.core.metadata.IPage;
- import com.example.study.model.entity.UserEntity;
- import com.example.study.model.param.UserParam;
- import com.example.study.model.vo.ResponseVo;
- import com.example.study.service.UserService;
- import com.example.study.util.CommonQueryPageUtils;
- import com.example.study.util.BuildResponseUtils;
- import io.swagger.annotations.Api;
- import io.swagger.annotations.ApiOperation;
- import org.springframework.beans.factory.annotation.Autowired;
- import org.springframework.web.bind.annotation.*;
- /**
- * 用户控制器
- *
- * @author 154594742@qq.com
- * @date: 2021/2/22 10:02:00
- */
- @RestController
- @Api(tags = "用户控制器")
- public class UserController {
- @Autowired
- private UserService userService;
- @ApiOperation("新增")
- @PostMapping("user")
- public ResponseVo<?> add(UserEntity entity) {
- return userService.save(entity) ? BuildResponseUtils.success() : BuildResponseUtils.error();
- }
- @ApiOperation("通过id查询")
- @GetMapping("user/{id}")
- public ResponseVo<UserEntity> getById(@PathVariable String id) {
- return BuildResponseUtils.buildResponse(userService.getById(id));
- }
- @ApiOperation("修改")
- @PutMapping("user")
- public ResponseVo<?> update(UserEntity entity) {
- return userService.updateById(entity) ? BuildResponseUtils.success() : BuildResponseUtils.error();
- }
- @ApiOperation("通过id删除")
- @DeleteMapping("user/{id}")
- public ResponseVo<?> delete(@PathVariable String id) {
- return userService.removeById(id) ? BuildResponseUtils.success() : BuildResponseUtils.error();
- }
- @ApiOperation("分页查询")
- @GetMapping("userPage")
- public ResponseVo<IPage<UserEntity>> selectPage(UserParam param) {
- return BuildResponseUtils.buildResponse(CommonQueryPageUtils.commonQueryPage(param, userService));
- }
- }
8、创建枚举CodeMsgEnum.java
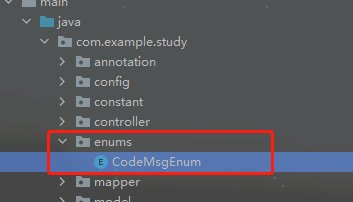
- package com.example.study.enums;
- /**
- * 异常类code常量(code值不要重复)
- *
- * @author 154594742@qq.com
- * @date: 2021/2/22 9:42:00
- */
- public enum CodeMsgEnum {
- //请求成功
- SUCCESS("0","成功!"),
- //系统异常
- FAIL("1","失败!"),
- //以下是业务异常
- LOGIN_NO_PASS("1001","用户名或密码错误"),
- ;
- /**
- * 状态码
- */
- public String code;
- /**
- * 状态码对应信息
- */
- public String msg;
- CodeMsgEnum(String code, String msg) {
- this.code = code;
- this.msg = msg;
- }
- }
9、创建统一的返回结果类ResponseVo.java
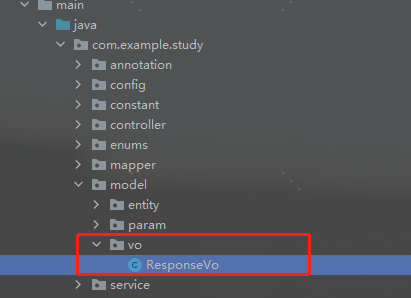
- package com.example.study.model.vo;
- import io.swagger.annotations.ApiModel;
- import io.swagger.annotations.ApiModelProperty;
- import lombok.AllArgsConstructor;
- import lombok.Data;
- import lombok.NoArgsConstructor;
- import java.io.Serializable;
- /**
- * 统一的返回对象VO
- *
- * @author 154594742@qq.com
- * @date: 2021/2/22 10:02:00
- */
- @Data
- @NoArgsConstructor
- @AllArgsConstructor
- @ApiModel(value = "ResponseVo", description = "统一的返回对象")
- public class ResponseVo<T> implements Serializable {
- private static final long serialVersionUID = 7748070653645596712L;
- /**
- * 状态码
- */
- @ApiModelProperty(value = "状态码")
- private String code;
- /**
- * 状态码对应描述信息
- */
- @ApiModelProperty(value = "状态码对应描述信息")
- private String msg;
- /**
- * 数据
- */
- @ApiModelProperty(value = "数据")
- private T data;
- }
10、创建常量类QueryMethodConstant.java
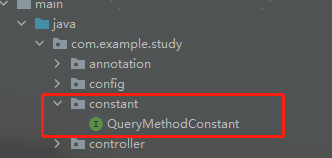
- package com.example.study.constant;
- /**
- * mybatis plus常用的查询方式
- * @author 154594742@qq.com
- * @date 2021/2/23 11:24
- */
- public interface QueryMethodConstant {
- /**
- * 相同
- */
- String EQ = "EQ";
- /**
- * 不相同
- */
- String NE = "NE";
- /**
- * 相似,左右模糊(like '%值%')
- */
- String LIKE = "LIKE";
- /**
- * 相似,左模糊(like '%值')
- */
- String LIKE_LIFT = "LIKE_LIFT";
- /**
- * 相似,右模糊(like '值%')
- */
- String LIKE_RIGHT = "LIKE_RIGHT";
- /**
- * 不相似 (not like '%值%')
- */
- String NOT_LIKE = "NOT_LIKE";
- /**
- * 大于
- */
- String GT = "GT";
- /**
- * 大于等于
- */
- String GE = "GE";
- /**
- * 小于
- */
- String LT = "LT";
- /**
- * 小于等于
- */
- String LE = "LE";
- }
11、创建自定义注解QueryMethod.java(用于后续的通用分页查询工具类)
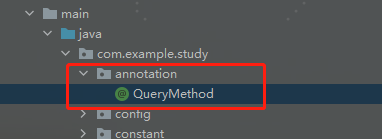
- package com.example.study.annotation;
- import java.lang.annotation.ElementType;
- import java.lang.annotation.Retention;
- import java.lang.annotation.RetentionPolicy;
- import java.lang.annotation.Target;
- /**
- * 查询方式的自定义注解
- * @author 154594742@qq.com
- * @date 2021/2/23 11:24
- */
- @Retention(RetentionPolicy.RUNTIME)
- @Target(value = ElementType.FIELD)
- public @interface QueryMethod {
- /**
- * 字段名
- */
- String field() default "";
- /**
- * 匹配方式
- */
- String method() default "";
- }
12、创建构建返回结果工具类BuildResponseUtils.java
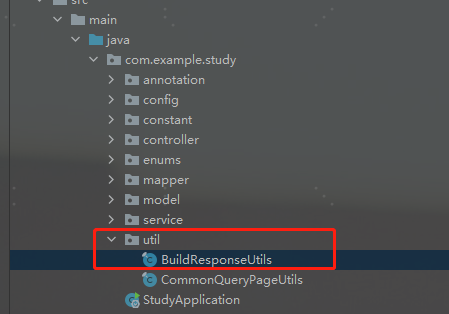
- package com.example.study.util;
- import com.example.study.enums.CodeMsgEnum;
- import com.example.study.model.vo.ResponseVo;
- /**
- * 构建返回结果工具类
- *
- * @author 154594742@qq.com
- * @date: 2021/2/22 10:02:00
- */
- public final class BuildResponseUtils {
- /**
- * 构建正确请求的response
- *
- * @return ResponseVo 统一的返回结果
- */
- public static ResponseVo<?> success() {
- ResponseVo<?> response = new ResponseVo<>();
- response.setCode(CodeMsgEnum.SUCCESS.code);
- response.setMsg(CodeMsgEnum.SUCCESS.msg);
- return response;
- }
- /**
- * 构建业务异常的response
- * @param codeMsgEnum 枚举
- * @return ResponseVo 统一的返回结果
- */
- public static ResponseVo<?> success(CodeMsgEnum codeMsgEnum) {
- ResponseVo<?> response = new ResponseVo<>();
- response.setCode(codeMsgEnum.code);
- response.setMsg(codeMsgEnum.msg);
- return response;
- }
- /**
- * 构建自定义code和msg的业务异常
- *
- * @param code 自定义code
- * @param msg 自定义msg
- * @return ResponseVo 统一的返回结果
- */
- public static ResponseVo<?> success(String code, String msg) {
- ResponseVo<?> response = new ResponseVo<>();
- response.setCode(code);
- response.setMsg(msg);
- return response;
- }
- /**
- * 构建系统异常的response(只用于系统异常)
- * @return ResponseVo 统一的返回结果
- */
- public static ResponseVo<?> error() {
- ResponseVo<?> response = new ResponseVo<>();
- response.setCode(CodeMsgEnum.FAIL.code);
- response.setMsg(CodeMsgEnum.FAIL.msg);
- return response;
- }
- /**
- * 构建返回结果
- * @param obj 结果数据
- * @param <T> 结果数据的泛型
- * @return ResponseVo 统一的返回结果
- */
- public static <T> ResponseVo<T> buildResponse(T obj) {
- ResponseVo<T> response = new ResponseVo<>();
- response.setData(obj);
- response.setCode(CodeMsgEnum.SUCCESS.code);
- response.setMsg(CodeMsgEnum.SUCCESS.msg);
- return response;
- }
- }
13、创建分页查询工具类CommonQueryPageUtils.java(本人自己封装的,功能可能不是很完善,但是基本的单表查询够用了)
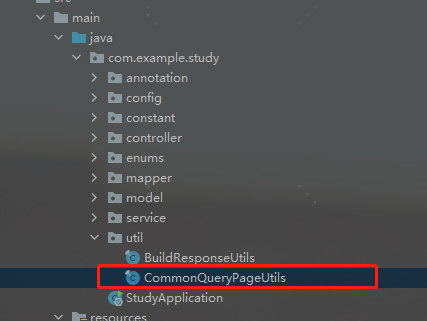
- package com.example.study.util;
- import com.baomidou.mybatisplus.core.conditions.query.QueryWrapper;
- import com.baomidou.mybatisplus.core.metadata.IPage;
- import com.baomidou.mybatisplus.core.metadata.OrderItem;
- import com.baomidou.mybatisplus.core.toolkit.StringUtils;
- import com.baomidou.mybatisplus.extension.plugins.pagination.Page;
- import com.baomidou.mybatisplus.extension.service.IService;
- import com.example.study.annotation.QueryMethod;
- import com.example.study.constant.QueryMethodConstant;
- import com.example.study.model.param.PageParam;
- import java.lang.reflect.Field;
- import java.util.Locale;
- /**
- * 分页查询工具类
- *
- * @author 154594742@qq.com
- * @date: 2021/2/22 10:02:00
- */
- public final class CommonQueryPageUtils {
- /**
- * 正序
- */
- private static final String ASC = "asc";
- /**
- * 倒序
- */
- private static final String DESC = "desc";
- /**
- * 通用的带排序功能的分页查询
- */
- public static <T> IPage<T> commonQueryPage(PageParam param, IService<T> service) {
- //构建page
- //根据传入的排序设置order
- //排序字段(格式:字段名:排序方式,字段名:排序方式 (asc正序,desc倒序) 示例:id:desc,age:asc)
- Page<T> page = new Page<>(param.getPage(), param.getLimit());
- String orders = param.getOrders();
- if (StringUtils.isNotBlank(orders)) {
- String[] splitArr = orders.split(",");
- for (String str : splitArr) {
- if (StringUtils.isBlank(str)) {
- continue;
- }
- String[] strArr = str.split(":");
- if (strArr.length != 2 || StringUtils.isBlank(strArr[0]) || StringUtils.isBlank(strArr[1])) {
- continue;
- }
- if (ASC.equals(strArr[1].toLowerCase(Locale.ROOT))) {
- page.addOrder(OrderItem.asc(strArr[0]));
- continue;
- }
- if (DESC.equals(strArr[1].toLowerCase(Locale.ROOT))) {
- page.addOrder(OrderItem.desc(strArr[0]));
- }
- }
- }
- //根据自定义注解构建queryWrapper
- QueryWrapper<T> queryWrapper = new QueryWrapper<>();
- Class<? extends PageParam> clazz = param.getClass();
- Field[] fields = clazz.getDeclaredFields();
- for (Field field : fields) {
- //设置对象的访问权限,保证对private的属性可以访问
- field.setAccessible(true);
- QueryMethod annotation = field.getAnnotation(QueryMethod.class);
- try {
- //属性没有值则跳过
- if (null == field.get(param)) {
- continue;
- }
- //没有加@QueryMethod 默认属性名为字段名,默认匹配方式为eq
- if (null == annotation) {
- queryWrapper.eq(field.getName(), field.get(param));
- continue;
- }
- switch (annotation.method()) {
- case QueryMethodConstant.EQ:
- queryWrapper.eq(annotation.field(), field.get(param));
- break;
- case QueryMethodConstant.NE:
- queryWrapper.ne(annotation.field(), field.get(param));
- break;
- case QueryMethodConstant.LIKE:
- queryWrapper.like(annotation.field(), field.get(param));
- break;
- case QueryMethodConstant.LIKE_LIFT:
- queryWrapper.likeLeft(annotation.field(), field.get(param));
- break;
- case QueryMethodConstant.LIKE_RIGHT:
- queryWrapper.likeRight(annotation.field(), field.get(param));
- break;
- case QueryMethodConstant.GT:
- queryWrapper.gt(annotation.field(), field.get(param));
- break;
- case QueryMethodConstant.GE:
- queryWrapper.ge(annotation.field(), field.get(param));
- break;
- case QueryMethodConstant.LT:
- queryWrapper.lt(annotation.field(), field.get(param));
- break;
- case QueryMethodConstant.LE:
- queryWrapper.le(annotation.field(), field.get(param));
- break;
- default:
- ;
- }
- } catch (IllegalAccessException e) {
- e.printStackTrace();
- }
- }
- return service.page(page, queryWrapper);
- }
- }
14、创建统一的分页查询请求参数类PageParam.java
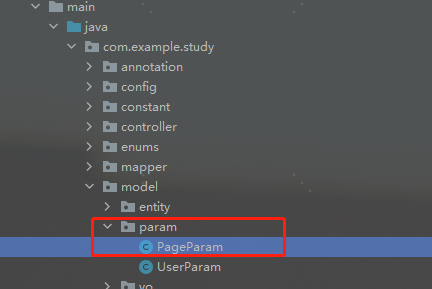
- package com.example.study.model.param;
- import io.swagger.annotations.ApiModel;
- import io.swagger.annotations.ApiModelProperty;
- import lombok.Data;
- import java.util.LinkedHashMap;
- /**
- * 统一的分页查询请求参数
- *
- * @author 154594742@qq.com
- * @date 2021/2/22 17:24
- */
- @Data
- @ApiModel(value = "PageParam", description = "分页参数")
- public class PageParam {
- /**
- * 页码
- */
- @ApiModelProperty(value = "页码,不传则默认1")
- private Integer page = 1;
- /**
- * 每页条数
- */
- @ApiModelProperty(value = "每页条数,不传则默认10")
- private Integer limit = 10;
- /**
- * 排序字段(格式:字段名:排序方式,字段名:排序方式 (asc正序,desc倒序) 示例:id:desc,age:asc)
- */
- @ApiModelProperty(value = "排序字段(格式:字段名:排序方式,字段名:排序方式 (asc正序,desc倒序) 示例:id:desc,age:asc)")
- private String orders;
- }
15、创建用户查询条件类UserParam.java继承PageParam(以后分页查询的参数类都要继承PageParam)
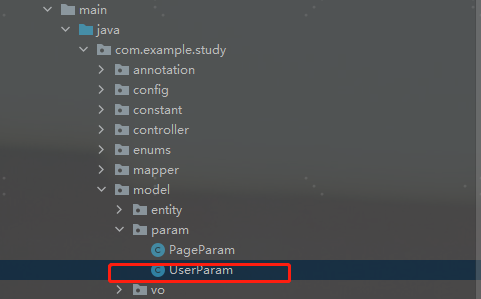
- package com.example.study.model.param;
- import com.example.study.annotation.QueryMethod;
- import com.example.study.constant.QueryMethodConstant;
- import io.swagger.annotations.ApiModel;
- import io.swagger.annotations.ApiModelProperty;
- import lombok.Data;
- /**
- * 用户查询条件类(需要根据哪些字段查询就添加哪些字段)
- * @author 154594742@qq.com
- * @date 2021/2/22 17:24
- */
- @Data
- @ApiModel(value = "UserParam", description = "用户查询条件")
- public class UserParam extends PageParam {
- /**
- * 通过@QueryMethod注解来控制匹配的方式,这里查询条件为 name like ‘%值%'
- */
- @ApiModelProperty(value = "姓名")
- @QueryMethod(field = "name", method = QueryMethodConstant.LIKE)
- private String name;
- /**
- * 这里没有@QueryMethod注解则如果age有值,则默认查询条件为 age=值
- */
- @ApiModelProperty(value = "年龄")
- private Integer age;
- /**
- * 假如要查询 (值1 < age < 值2)则可以采用如下方式添加两个属性minAge和maxAge,
- * ‘ @QueryMethod 注解的field是数据表字段名,method是查询方式
- * 假如minAge = 18,maxAge=25,则通过CommonQueryPageUtils工具类会构建出的sql为 18<age AND age>25
- */
- @ApiModelProperty(value = "年龄下限")
- @QueryMethod(field = "age", method = QueryMethodConstant.GT)
- private String minAge;
- @ApiModelProperty(value = "年龄上限")
- @QueryMethod(field = "age", method = QueryMethodConstant.LT)
- private String maxAge;
- }
16、先在数据库中添加几条测试数据,然后启动项目后打开http://localhost:8080/swagger-ui.html
- insert into `t_user`(`id`,`name`,`age`) values
- (1,'小二',20),
- (2,'张三',20),
- (3,'李四',20),
- (4,'王五',35),
- (5,'小六',18);
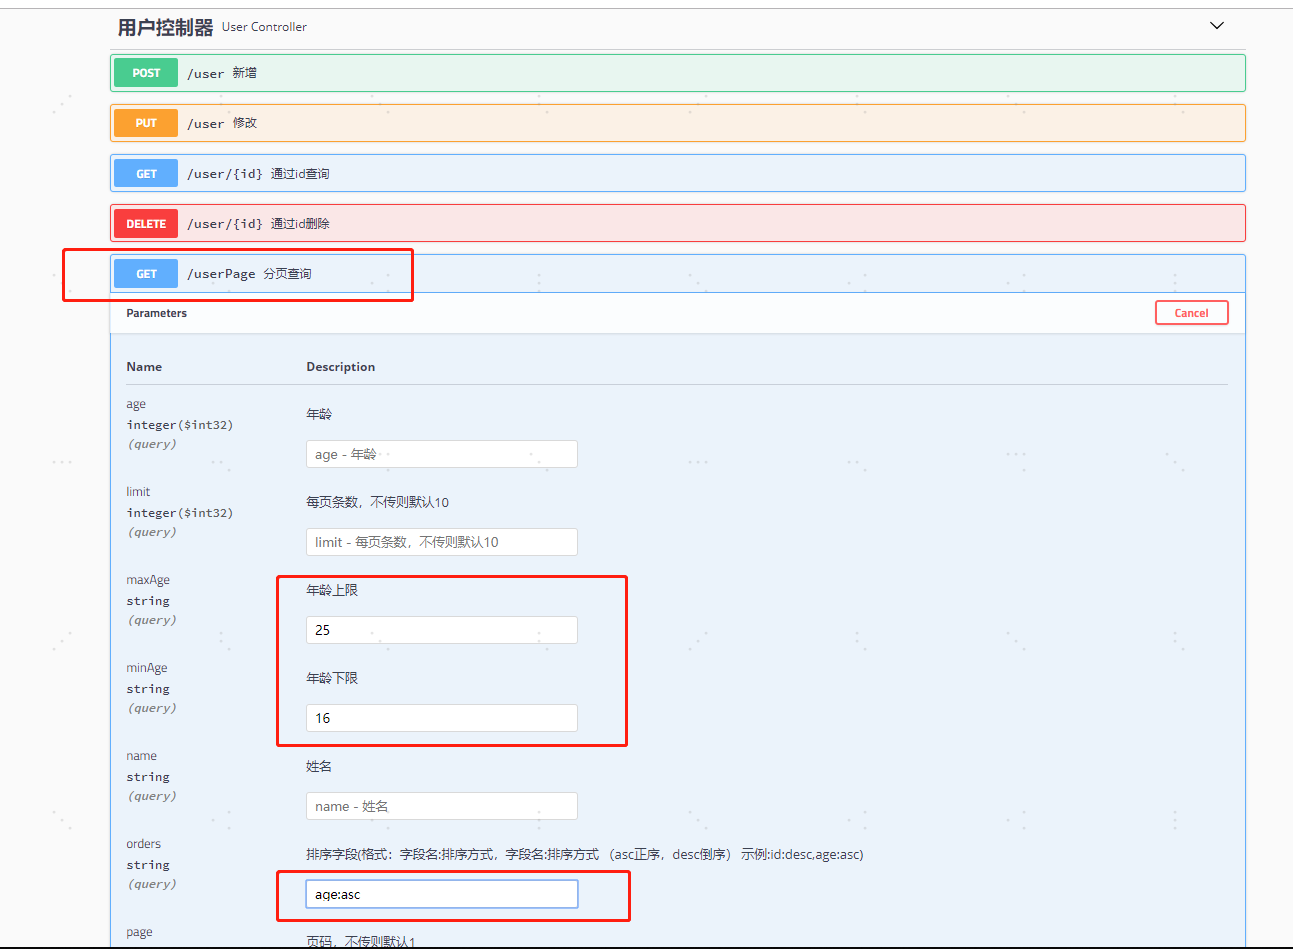
17、按上图填入查询条件,然后点击“Execute”执行
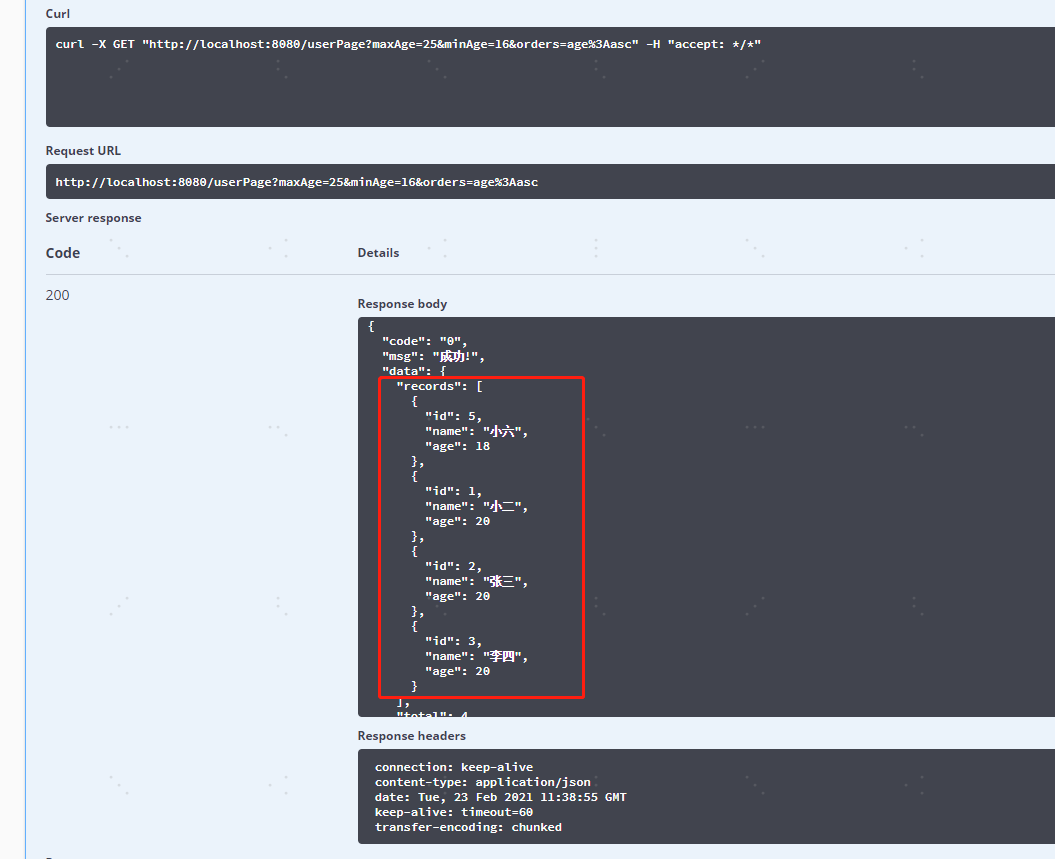
返回的Response body:
- {
- "code": "0",
- "msg": "成功!",
- "data": {
- "records": [
- {
- "id": 5,
- "name": "小六",
- "age": 18
- },
- {
- "id": 1,
- "name": "小二",
- "age": 20
- },
- {
- "id": 2,
- "name": "张三",
- "age": 20
- },
- {
- "id": 3,
- "name": "李四",
- "age": 20
- }
- ],
- "total": 4,
- "size": 10,
- "current": 1,
- "orders": [
- {
- "column": "age",
- "asc": true
- }
- ],
- "optimizeCountSql": true,
- "hitCount": false,
- "countId": null,
- "maxLimit": null,
- "searchCount": true,
- "pages": 1
- }
- }
通过上面的返回结果可以看出我们带条件带排序的的分页查询功能是ok的!!!
感谢你看完了此篇博文,如果有什么问题可以评论留言,附上完整代码 点击下载完整代码包
到此这篇关于Spring Boot整合Mybatis Plus和Swagger2的文章就介绍到这了,更多相关Spring Boot整合Mybatis Plus和Swagger2内容请搜索服务器之家以前的文章或继续浏览下面的相关文章希望大家以后多多支持服务器之家!
原文链接:https://www.cnblogs.com/wqp001/p/14436895.html

